Table of Contents
OpenAI API Integration
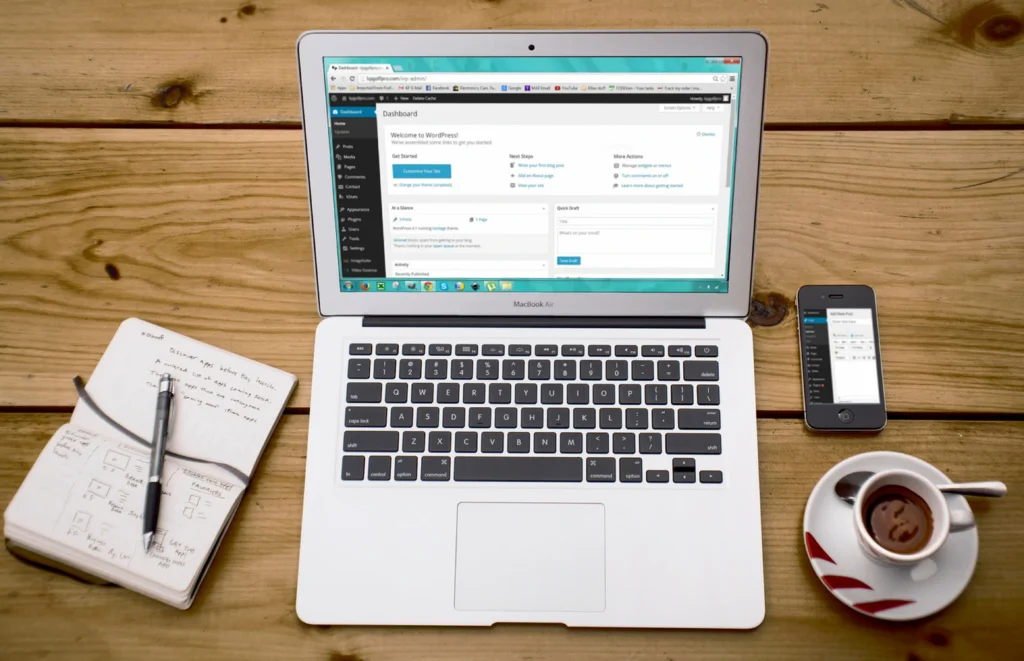
Here’s a step by step guide to how I developed a WordPress website with OpenAI API Integration.
Step 1: Planning (1-2 hours)
- Determine the purpose of your website: Whether it’s for a personal blog, business, portfolio, or e-commerce.
- Identify your target audience and their needs to tailor the website accordingly.
- Choose a suitable domain name that is memorable, relevant, and available for registration (in my case I had a free domain – so used it).
- Register your chosen domain name with a domain registrar
- Select a reliable web hosting provider (I like Hostinger, this is not a sponsored blog) that offers WordPress support and meets your website’s needs.
Step 2: WordPress Installation (1 hour)
- Sign up for a hosting plan and set up your hosting account.
- Access the hosting control panel (such as cPanel).
- Locate the “WordPress” installer or use the “One-Click Install” option provided by your hosting provider.
- Follow the installation wizard instructions to install WordPress on your domain.
- Create an admin account with a secure username and password.
Step 3: WordPress Configuration (1 hour)
- Log in to your WordPress dashboard using the admin account credentials.
- Choose a suitable theme that aligns with your website’s purpose and design preferences.
- Install and activate necessary plugins such as “Classic Editor,” “Contact Form 7,” and any other plugins required for specific functionalities.
- Configure the basic settings of your WordPress website, including site title, tagline, and permalink structure.
Step 4: AI Plugin Installation (1 hour)
- Research and identify an AI plugin (I used AI Engine – Free Version) that suits your website’s goals and requirements.
- Install the AI plugin through the WordPress dashboard by navigating to “Plugins” > “Add New” and searching for the plugin.
- Click on the “Install Now” button, and once installed, activate the plugin.
- Follow the provided documentation or instructions to configure the AI plugin according to your needs.
Step 5: OpenAI Integration (1-2 hours)
- Create an account with AI platform. In my case, I used OpenAI.
- Generate an API key or token from the OpenAI provider, following their documentation guidelines.
- Write the necessary code or use a plugin (I used AI Engine WordPress Plugin) to create a custom function for making API calls to the OpenAI.
- Test the API call implementation to ensure it successfully retrieves the desired data (works like magic in no time).
Step 6: Customization and Content Creation (4-6 hours)
- Customize the appearance of your website by selecting and configuring a theme that aligns with your branding and design preferences.
- Customize the theme settings, including colors, fonts, layouts, and header/footer options.
- Create essential pages such as Home, About, Contact, and any other necessary pages for your website.
- Utilize the AI plugin to generate or enhance content, such as automated content suggestions, chatbot integration, or language translation (in my case, I created pages for Mock Interview, Cognitive Aptitude Test etc and gave relevant prompts in the AI Engine Plugin Settings.
Step 7: Implement Additional Functionality (2-4 hours)
- Identify additional functionalities you want to incorporate into your website.
- Explore and install plugins that provide the desired features, such as SEO optimization (I used RankMath free version), security enhancements, caching, social media integration, or e-commerce capabilities.
- Configure and customize the installed plugins to align with your website’s needs.
- Add extra features like subscription forms, image galleries, testimonials, or interactive maps using suitable plugins or custom code.
Step 8: Testing and Optimization (2-4 hours)
Thoroughly test your website’s functionality across different browsers and devices ( I had some issues with iPhone users and Safari – but it seemed to fix itself later on).
Test forms, navigation, AI integration, and API calls to ensure they work as expected.
Click to know more about the above product from a Chatbot
Optimize your website’s performance by compressing images (I always use WebP image format), enabling caching (disable all caching plugins initially when testing the API), and minifying CSS and JavaScript files.
Use tools like PageSpeed Insights or GTmetrix (I did not do this part as I can monitor that from Google Analytics or a Google Site Kit Plugin) to analyze your website’s loading speed and identify areas for improvement.
- Optimize your website’s on-page SEO elements such as meta titles, descriptions, and header tags using the Rank Math SEO plugin.
- Ensure that your website is responsive and mobile-friendly, adjusting layouts and design elements if necessary.
- Conduct usability testing to ensure a smooth user experience, fixing any issues that arise.
Step 9: SEO, Google Search Console, and Google Analytics (2-3 hours)
- Install and activate the Rank Math SEO plugin, which offers advanced SEO capabilities and tools.
- Configure the Rank Math SEO plugin settings, including setting up XML sitemaps, optimizing content, and managing on-page SEO elements.
- Create a Google Search Console account and verify ownership of your website.
- Submit your website’s XML sitemap to Google Search Console to help with indexing and monitoring your website’s performance in search results.
- Create a property in Google Analytics and obtain the tracking code.
- Install a Google Analytics plugin or manually insert the tracking code into your WordPress theme to track website traffic, user behavior, and other valuable insights.

Step 10: Launch and Monitor (1 hour)
- Double-check all website elements and content for accuracy, including grammar, spelling, and broken links.
- Make a complete backup of your website to ensure data security.
- Connect your domain to your hosting account and launch your website.
- Monitor your website’s performance, security, AI functionality, and analytics data regularly.
- Stay updated with plugin and theme updates, ensuring compatibility and maintaining optimal website performance.
- Continuously improve and optimize your website based on user feedback and data analysis.
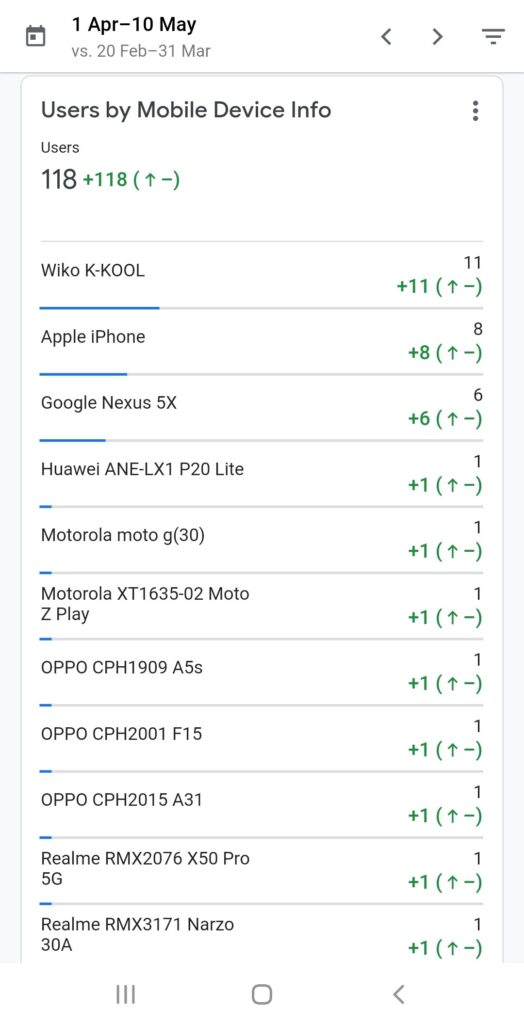
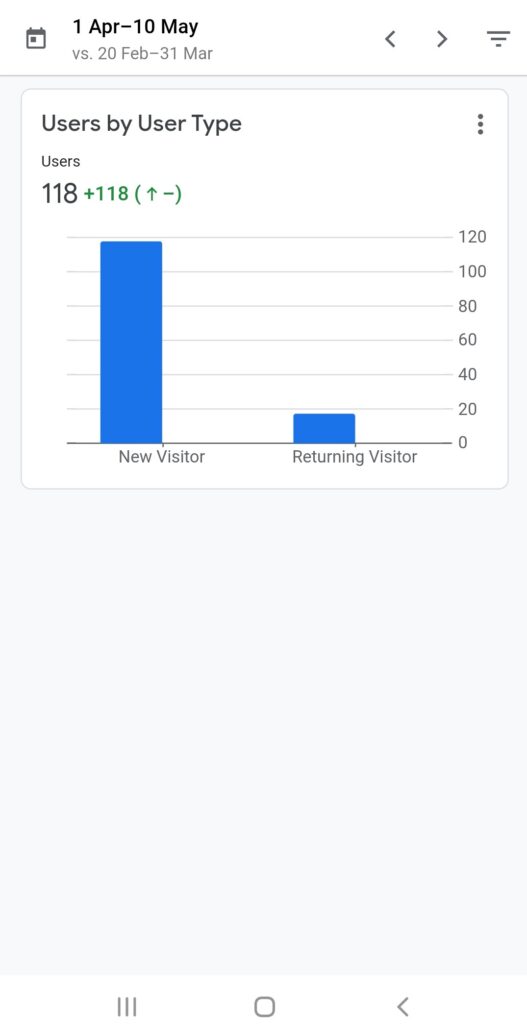
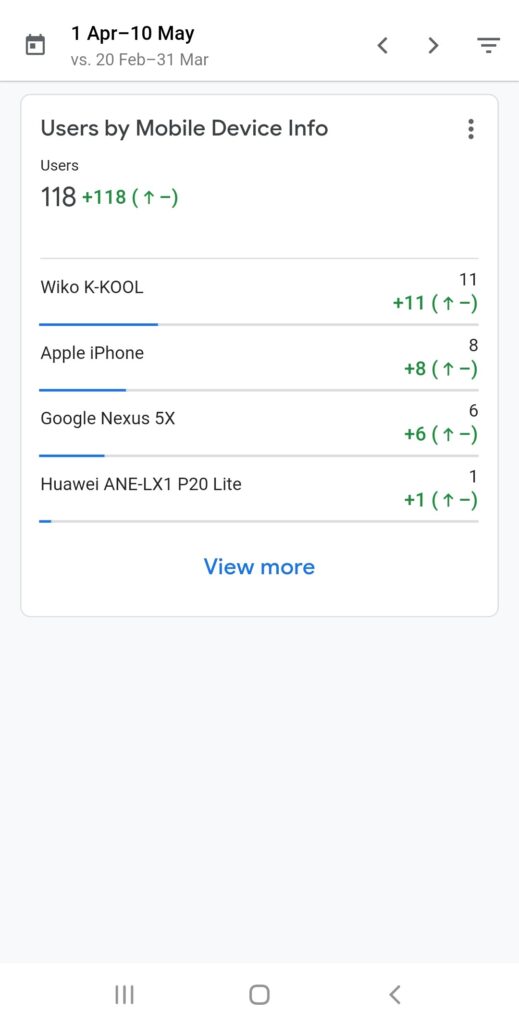
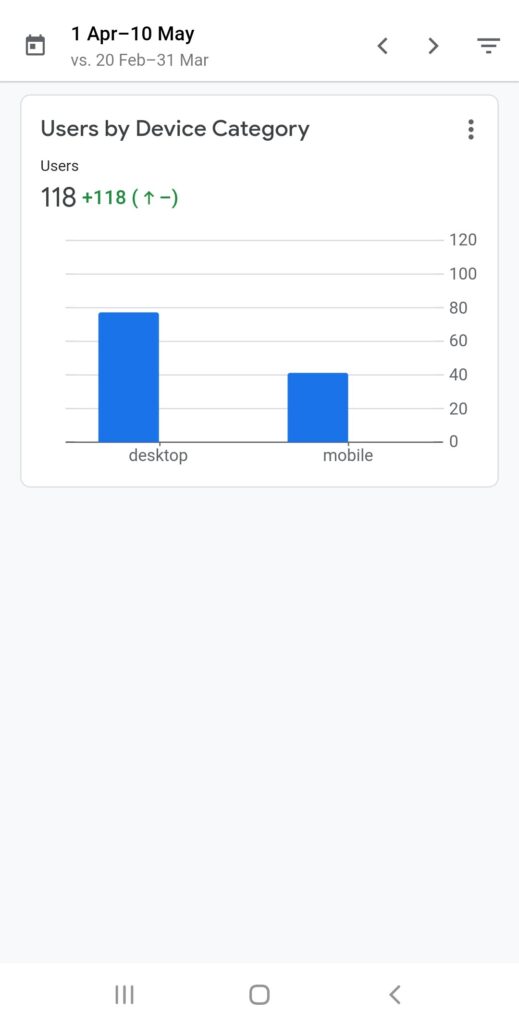
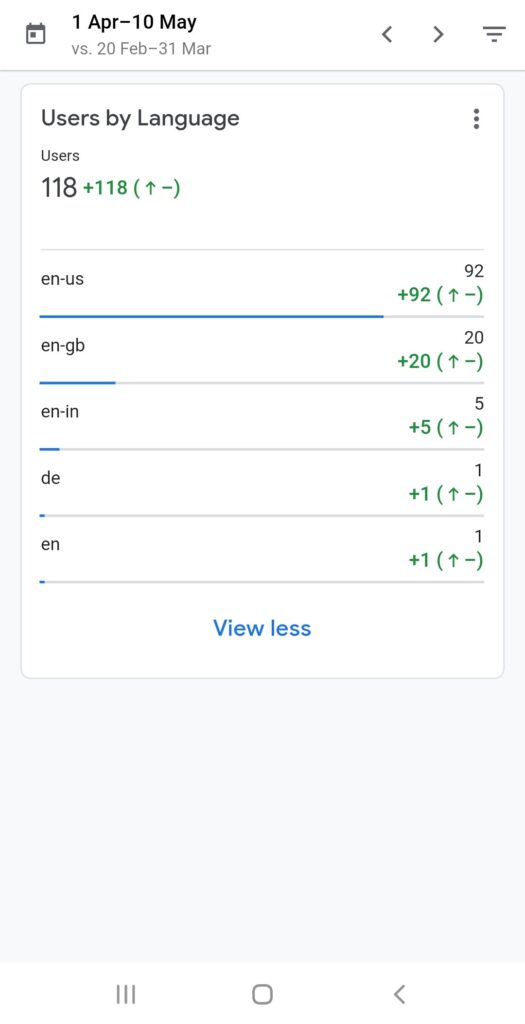
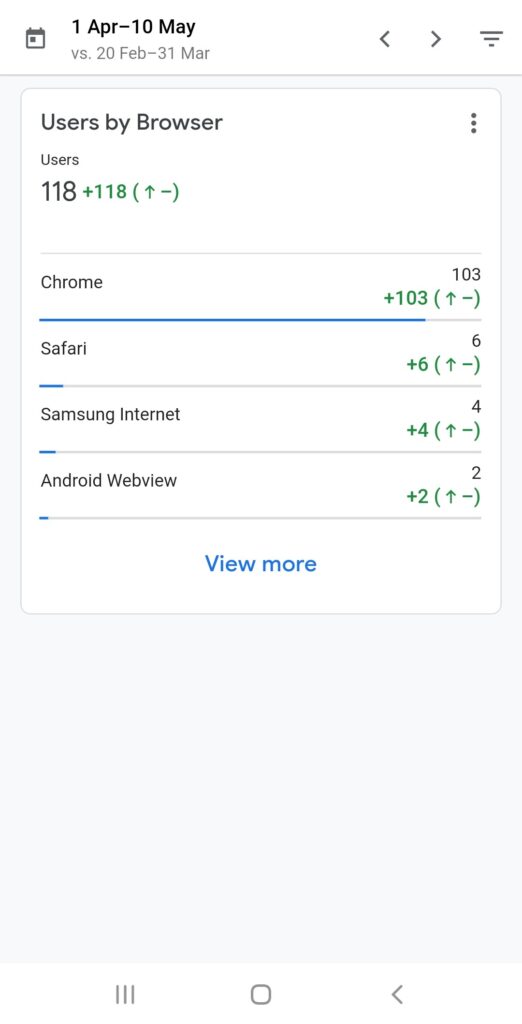
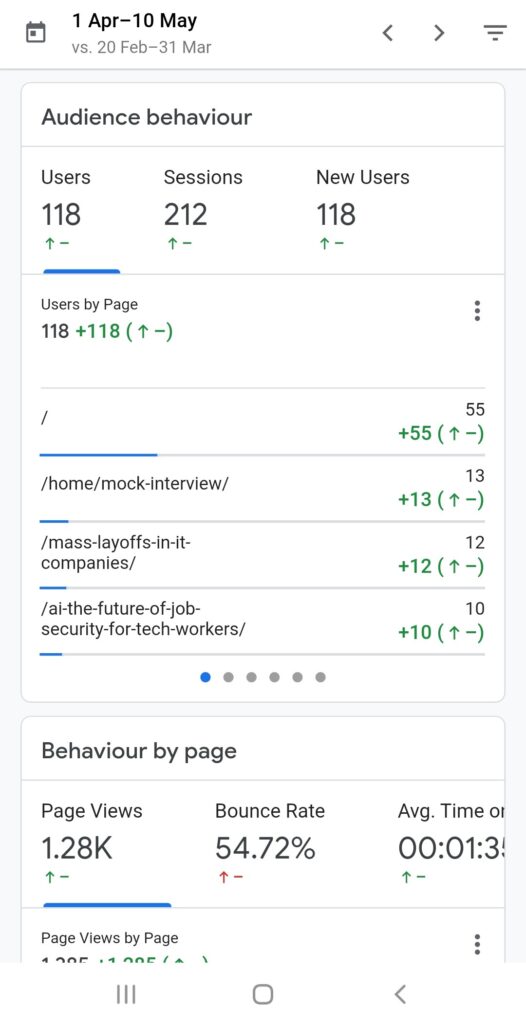
Here’s some insights after 20 days of launching the website.
Remember, building a fully functional and customized website requires time and effort. Feel free to adjust the time estimates for each step based on your familiarity with WordPress and web development skills.
Further Reading: https://techhorizoncity.com/the-limitless-possibilities-of-chatgpt/